Introduction
Drying fruit at home isn’t just a cool kitchen hack – it’s a great way to save money and create snacks that taste way better than store-bought ones. And guess what? You don’t need fancy tools: just your oven, fresh fruit, and patience. Let’s dive into drying fruit in your oven to enjoy these healthy treats anytime.
What Does It Mean to Dry Fruit in the Oven?
When you dry fruit, you remove its water content, which prevents it from spoiling. This process intensifies the fruit’s natural flavor and turns it into a much more portable snack. Drying fruit in the oven is easy, and unlike using a dehydrator, you probably already have everything you need at home.
Why Should You Dry Fruit in the Oven?
- Longer Shelf Life
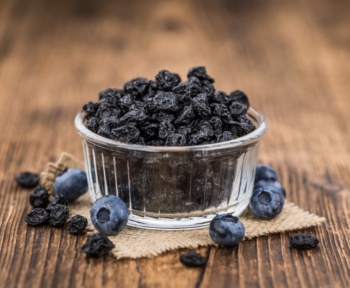
One of the best things about dried fruit is how long it keeps. While fresh fruit goes bad quickly, dried fruit can last for months—perfect for stocking up. Plus, if your favorite fruit is out of season, you can still enjoy it.
- No Unwanted Additives
Most store-bought dried fruit contains added sugars and preservatives. Yuck! When you dry your own, you get to control exactly what goes into it. Just pure fruit, that’s it.
- It’s Affordable
Dried fruit can be expensive, especially if you eat it regularly. Why spend all that money when you can dry your own for a fraction of the price? And when you buy fruit in season, it’s even cheaper!
- Space-Saving Snack
Dried fruit is super compact. No more worrying about fresh fruit taking up half your fridge. You can stack dried fruit in jars or bags; it doesn’t need refrigeration.
Best Fruits to Dry in the Oven
Some fruits are better suited for drying than others. Here’s a quick guide to the best ones to try:

What You Need to Dry Fruit in the Oven
To get started, here’s a list of what you’ll need:
- Oven: No need for a dehydrator—your oven can do the trick.
- Baking Sheets and Racks: These help with air circulation, ensuring the fruit dries evenly.
- Parchment Paper: Keeps the fruit from sticking to the pan.
- Oven Thermometer: Some ovens aren’t super accurate, so it’s good to have one to keep the temperature steady.
- Knife and Cutting Board: This is for chopping the fruit into nice, even slices.
How to Dry Fruit in the Oven: Step-by-Step
- Prepare the Fruit
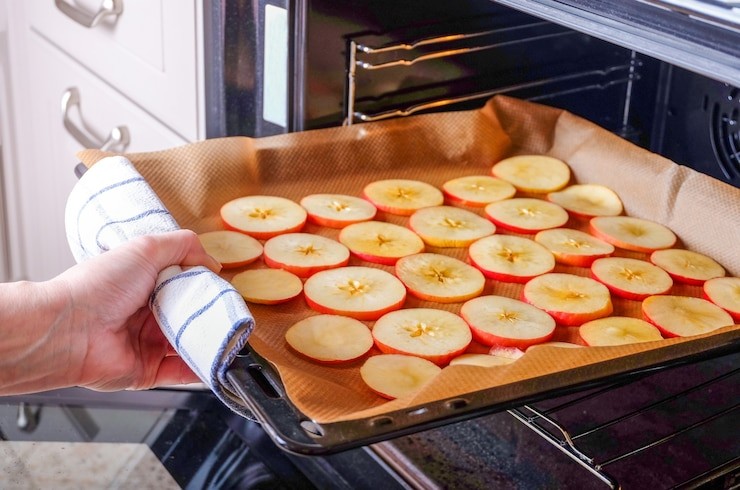
Start by picking ripe, fresh fruit. Wash it well, peel it if necessary, and remove any seeds or pits. Slice the fruit evenly so it dries uniformly. For apples, bananas, or pears, please give them a quick dip in lemon juice or an ascorbic acid solution to keep them from browning. If you slice it evenly, you’ll get evener drying results.
- Lay the Fruit on the Sheets
Once your fruit is prepped, arrange the slices in a single layer on your baking sheets. Don’t crowd them! Leave a little space between each slice so that air can circulate. You can use parchment paper to prevent sticking.
- Preheat Your Oven
Set your oven to a low temperature—around 130°F to 200°F (55°C to 90°C). Low heat helps the fruit dry slowly and evenly.
- Dry the Fruit
Place the baking sheets in the oven and let the fruit dry. Depending on the fruit and its thickness, this could take anywhere from 6 to 12 hours. Keep an eye on it and rotate the trays every couple of hours to make sure everything is drying evenly.

- Check for Doneness
After several hours, the fruit should be flexible but not sticky. When you can bend the fruit without it breaking, it’s done. It should feel leathery but not rock-hard.
- Cool and Store
Let the dried fruit cool completely on the baking sheets. Once it’s cool, transfer it to airtight containers. Glass jars or resealable bags work well for storage. Store your dried fruit in a cool, dark place, and it will keep for months.
Tips for Drying Fruit Perfectly
- Use Fresh Fruit
Freshness matters! Overripe fruit will also dry out. For the best results, stick to ripe fruit but not mushy.
- Leave Space Between Slices
This isn’t the time to squeeze all the slices together. The more space you leave between each piece, the better the air can circulate, helping the fruit dry evenly.
- Rotate the Sheets
Monitor your fruit every couple of hours and rotate the baking sheets. This ensures that every slice gets evenly dried and prevents burning.

- Take Your Time
Drying fruit isn’t a race. Let it dry slowly over several hours for the best texture and flavor. Avoid cranking up the temperature to speed things up. Low and slow wins the race here.
- Flavor It Up
Want to get a little fancy? Try sprinkling cinnamon or nutmeg on your fruit before drying. You can even dip your fruit in sugar syrup for a sweet treat.
Mistakes to Avoid When Drying Fruit in the Oven
- Using Too High of Heat
If you blast your oven with high heat, the fruit will cook, not dry. Keep the temperature low for the best results.
- Not Rotating the Sheets
Fruit dries best when it is heated from all sides. If you forget to rotate your baking sheets, the fruit might dry unevenly, leaving some pieces overdone while others are still wet.
- Overcrowding the Baking Sheets
Packing the fruit on your baking sheets is tempting, but overcrowding will only worsen the situation. Air needs to flow around each piece to dry it evenly. Spread it out!

Interview: Sarah Shares Her Drying Tips
We reached out to Sarah, a food enthusiast with a knack for making delicious and healthy snacks. Here’s her advice on drying fruit at home:
“Patience is key! Don’t rush the process—drying fruit at low temperatures takes time, but it’s worth it. I check my fruit every couple of hours and rotate the trays. If you’re patient, you’ll have perfect dried fruit every time.”
We love that! Sarah’s tips are spot on. The key to success when drying fruit is taking your time and letting the oven do its job.
Quick Guide to Fruit Drying Times and Slice Thickness
Here’s a handy reference for drying times and slice thicknesses:

Storing Your Dried Fruit for Maximum Freshness
After drying, let the fruit cool completely. Then, transfer it to airtight containers like glass jars or resealable bags. Store them in a cool, dark place, and they’ll last for several months. If you want to extend shelf life, you can also store your dried fruit in the fridge, though it’s not necessary if you’ll eat it within a few months.

Conclusion
Drying fruit in the oven is an easy, affordable way to make healthy snacks at home. You can turn fresh fruit into delicious, long-lasting treats with time and patience. Whether you’re drying apples, bananas, or mangoes, you’ll be able to enjoy the flavors of your favorite fruits all year long. Just follow these simple steps, and you’ll have your stash of homemade dried fruit ready to snack on anytime.